


Table of Contents
If you’re considering setting up a Google Business Profile and want to make sure you’re doing it correctly, then this guide is for you.
The steps you’ll see while creating your profile can vary based on the options you choose during setup, so if you encounter a step in this guide that doesn’t appear in your setup process, simply skip it and proceed to the relevant section that matches what you see on your screen.
No matter what options you choose during the setup process, you’ll be able to find instructions to guide you through every potential screen you’ll encounter.
Step 1: Create or Sign In to a Google Account
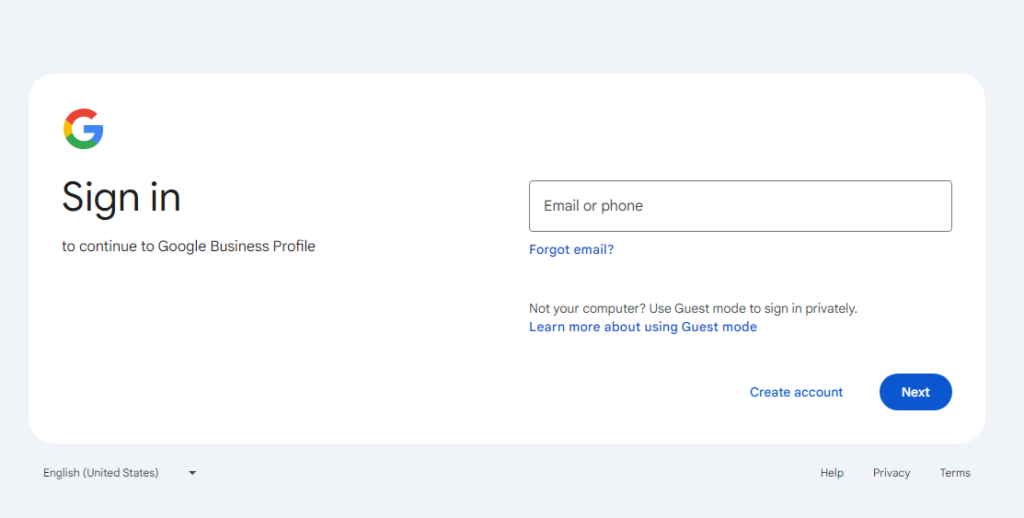
You’ll need to be logged in to a Google account to create a Google Business Profile. If you don’t have one, create one now at the Create a Google Account page, where you’ll find step-by-step instructions on creating an account.
Since this Google account will be used to manage your business profile, we recommend selecting “To manage a business” under “Choose a Google Account Type”.
If you don’t use Gmail, you can still create a Google Account with your existing email provider by selecting “Use your existing email” during the account creation process.
Step 2: Create a Google Business Profile
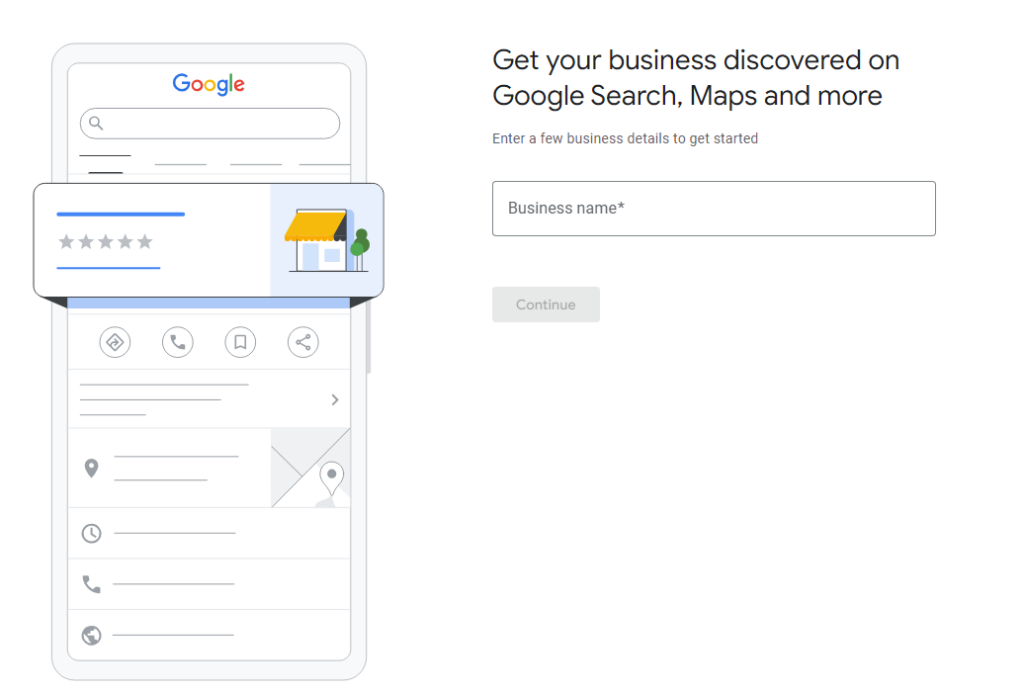
After signing in to your Google account, visit Google’s Business Profile page and select “Manage Now”.
You will be taken to a page where you can enter the name of your business. Enter the legal name of your business and do not include any words that are not part of your business name.
Note: Many businesses are officially registered with “LLC” at the end of their business name. It’s not required to include this in your profile business name, and many businesses choose to leave it out.
If your business shows up in the results:
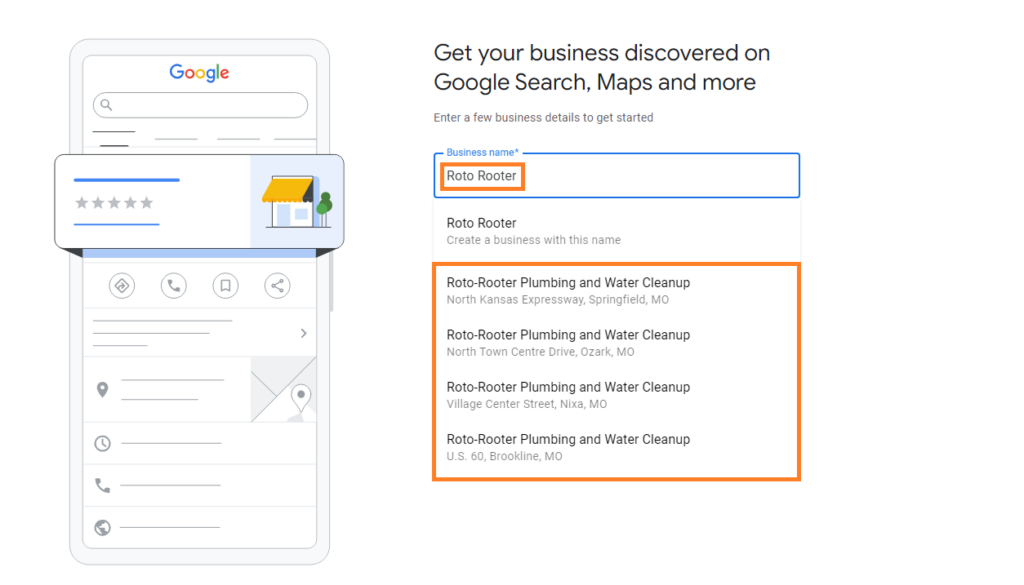
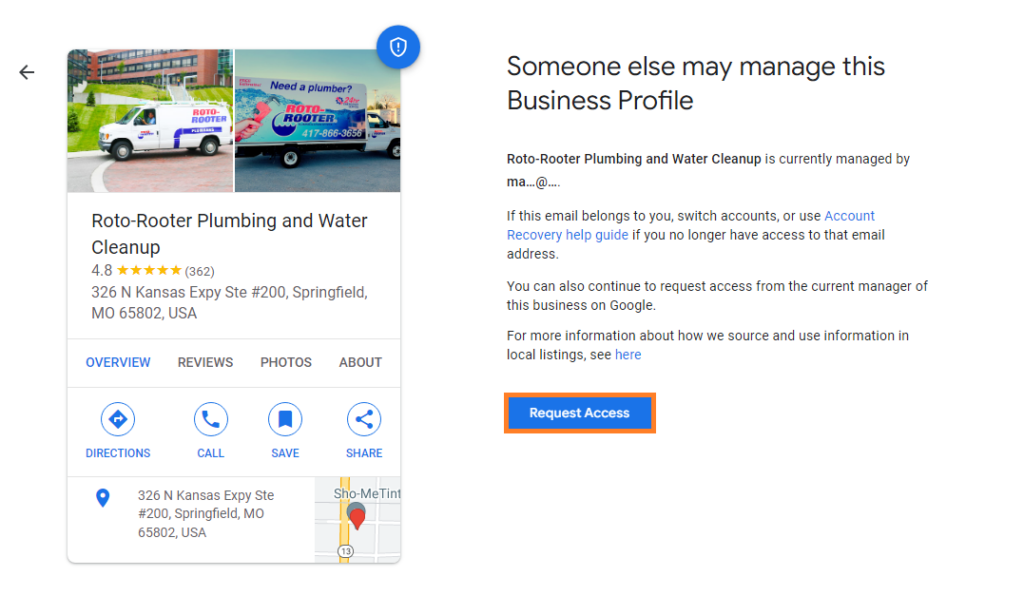
Your business is already listed on Google and you will need to select “Request Access” to gain access from the current business manager.
This could be:
- An SEO agency or consultant you’ve used in the past
- You, if you set up a business profile in the past but forgot about it
- An unauthorized person or third-party claiming to represent your business, which in this case, “Request Access” can be used to regain control over your listing
Note: If another business has the same name in a different state, it may show up in the list, so check the address beneath the business name to be sure.
If your business does not show up in the results:
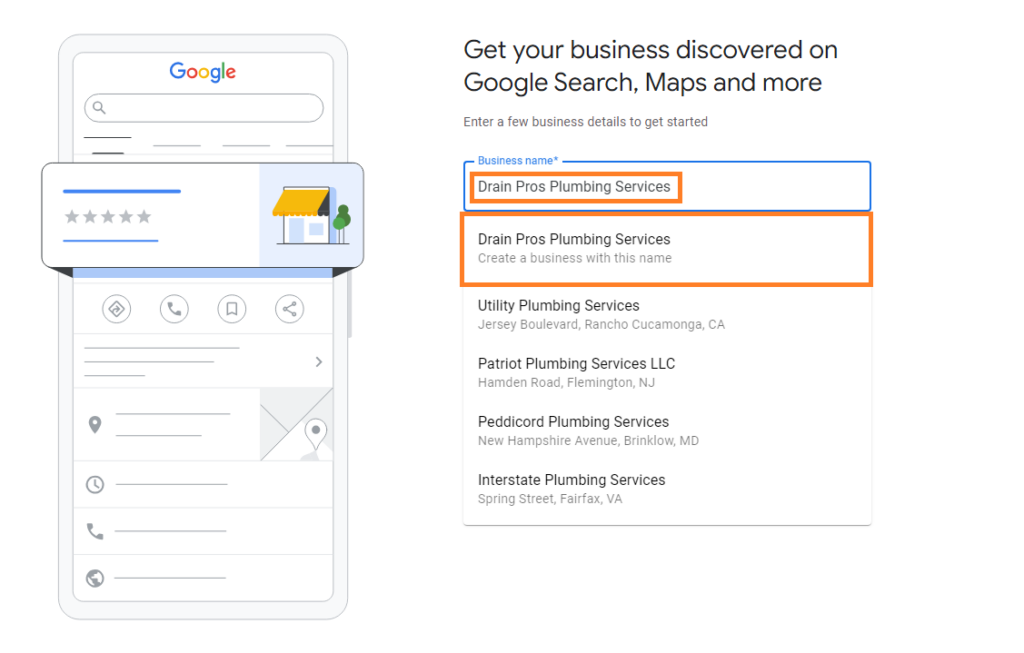
Select the option at the top that says “Create a business with this name” and click “Continue”.
Step 3: Choose Your Business Type
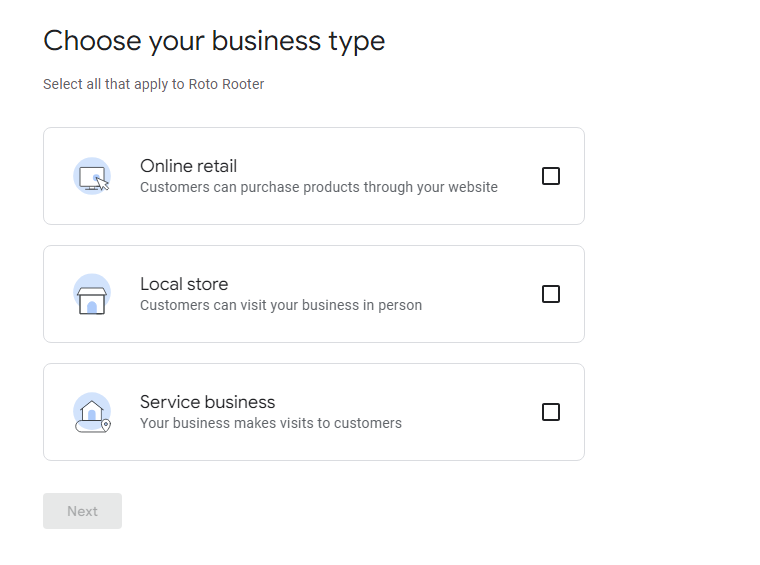
You will now be on a page where you can select your business type. Select all options that are applicable.
Business Types
Online Retail
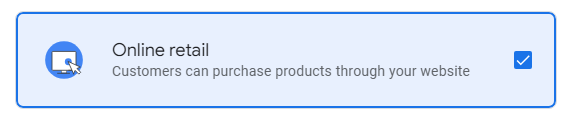
If you sell products but do not have a physical storefront, selecting this as the only option will sign you up for a Google Merchant Center account. Online-only businesses are not eligible for a Google Business Profile, which is reserved for businesses with a physical location that customers can visit or businesses that travel to meet customers at their location, such as service businesses.
Local Store
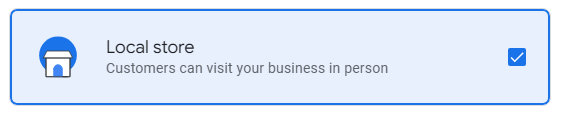
If your business has a physical location that customers can visit, select this option.
Service Business
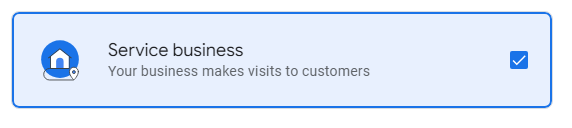
If you travel to meet customers at their location, select this option.
Step 4: Enter Your Business Category
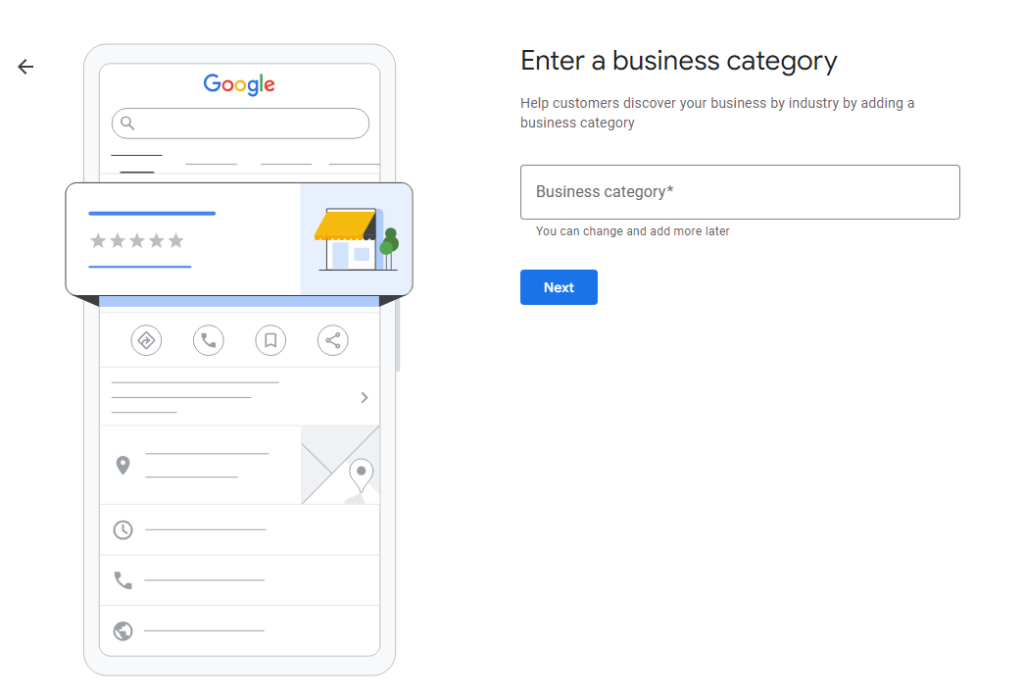
You can now select your business category. At this stage, you want to select the most relevant category for your business. You will have the option to add more categories later, as well as change categories if your business offers different services depending on the season.
For example, if your main service is lawn care but you also offer junk removal, you would select “Lawn Care Service” at this stage, and add “Junk Removal Service” as an additional category later.
If you also offer snow removal services in the winter, you would simply change your primary category to “Snow Removal Service” at the start of winter.
Note: Choosing the correct primary category is extremely important if you want to show up for relevant searches, so try searching for different categories before deciding which one to select.
Step 5: Enter Your Business Address
Depending on what business type(s) you selected earlier, you’ll get different pages to enter your business address or service areas.
Business Type: Local Store
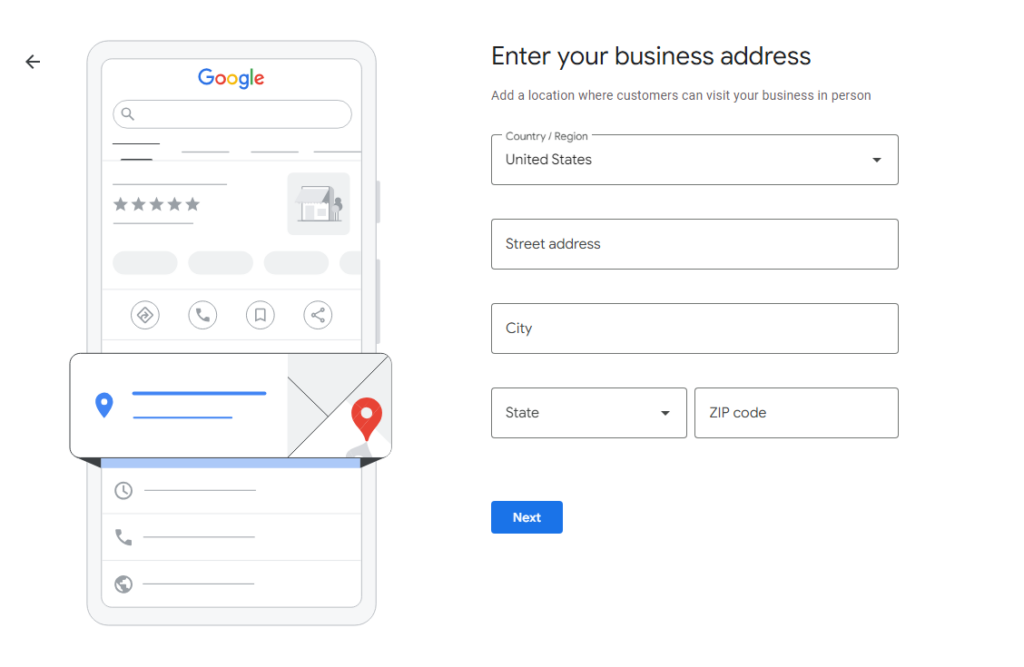
If you selected local store as the sole option for your business type, you’ll see a screen where you can enter your business address. Enter the address that customers can visit you at.
Business Type: Service Business
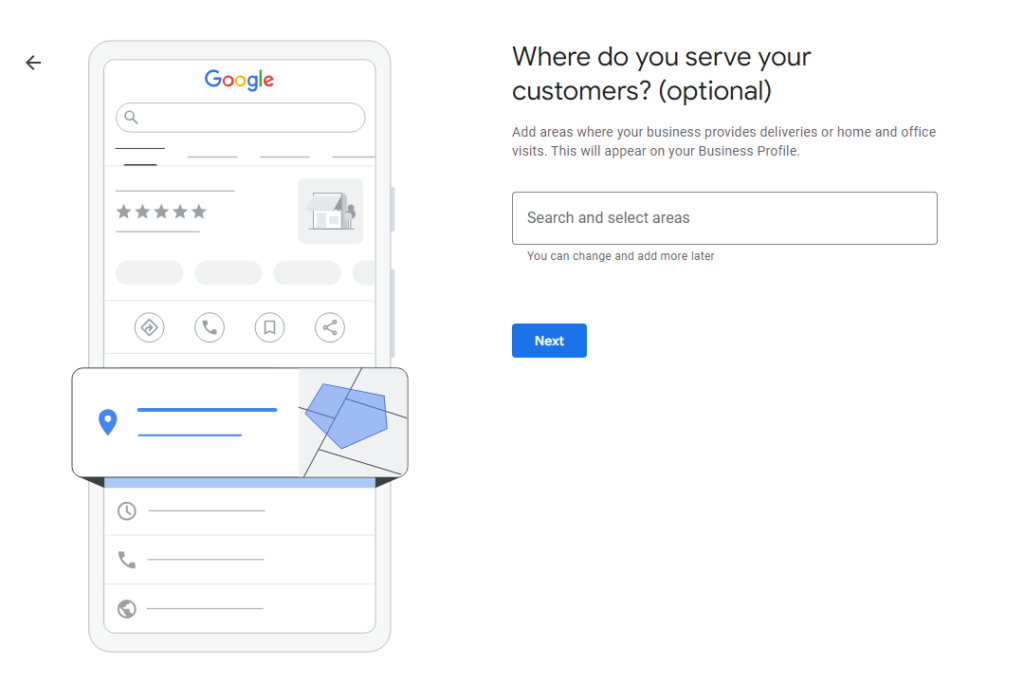
If you selected service business as the sole option for your business type, you’ll see a screen that lets you select the areas where you serve your customers. You can select up to 20 service areas, though this is rarely necessary. Per Google’s guidelines, you should not select locations that are more than 2 hours driving time away from where your business is based.
- If you serve entire cities, add all cities you’re willing to travel to provide your service (most common).
- If you’re located in or near a large city and only serve certain counties within the city, select all counties that you’re willing to travel to provide your service (less common).
The service areas you select will not impact your GBP ranking in those areas. However, those areas will be shaded in when a customer sees your business on Google Maps, so be sure to only include areas you actually serve.
Note: You can choose a combination of cities and counties as well. For example, if you serve all of one city, but only certain counties in a nearby city, you can mix and match options.
Business Type: Local Store + Service Business (hybrid model)
If you selected both local store and service business, follow the steps above depending on what Google asks you to enter for your business address and/or service areas.
Step 6: Add Contact Details
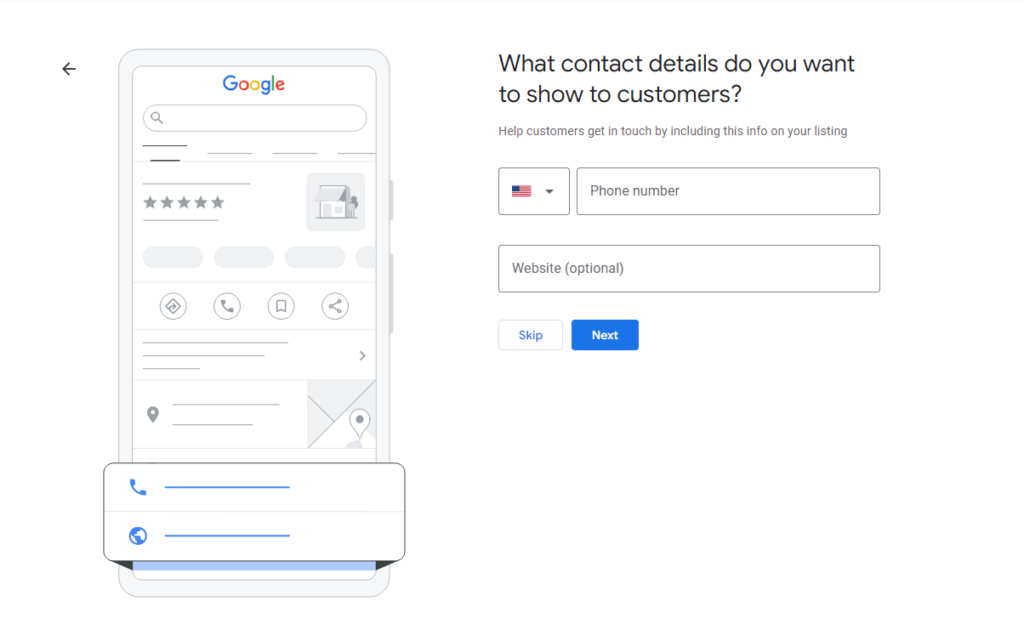
On this screen, add your business phone number and your website if you have one. While a website isn’t required, creating a website adds legitimacy to your profile and offers a host of other local SEO benefits that can further help you attract new customers.
Step 7: Verify Your Business
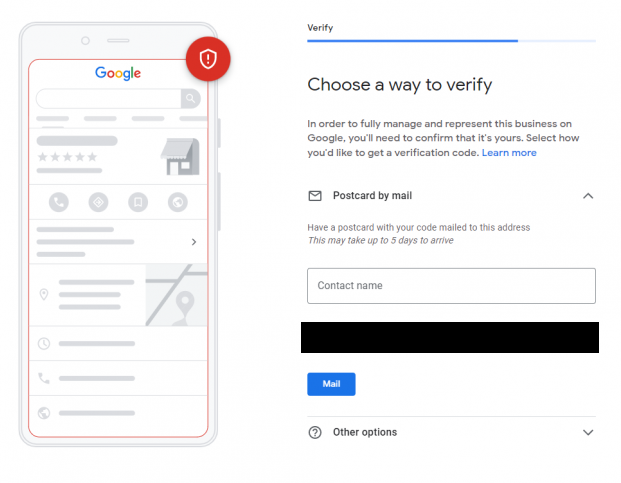
You will now likely be asked to verify your business. Google has several different methods they use to verify businesses, and it’s up to them on what verification options you can use. If there is a legitimate reason you cannot verify your business, you can request an alternate verification method.
Refer to Google’s documentation on verification methods for more information.
Step 8: Add Your Services

You should now see a screen where you can add your services. Google provides a list of recommended services based on the business category you selected. Select all services that you offer. If you offer services that aren’t listed, select “Add custom service” and enter it there.
Step 9: Add Your Business Hours
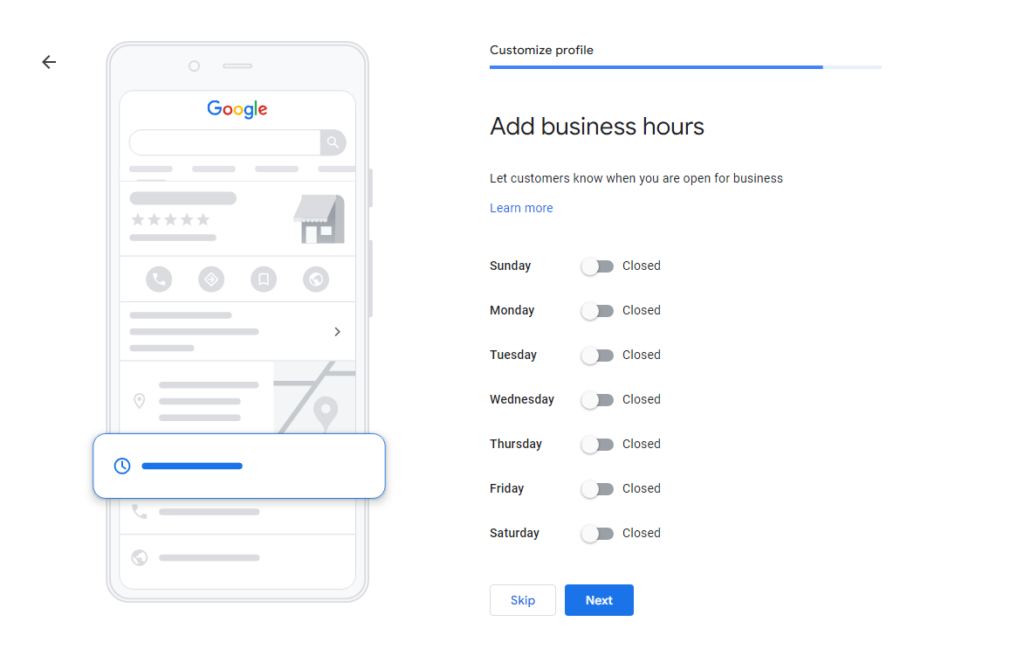
You can now enter your business hours. Select all days that your business operates and enter the hours of operation for each day.
Step 10: Add Messaging (optional)
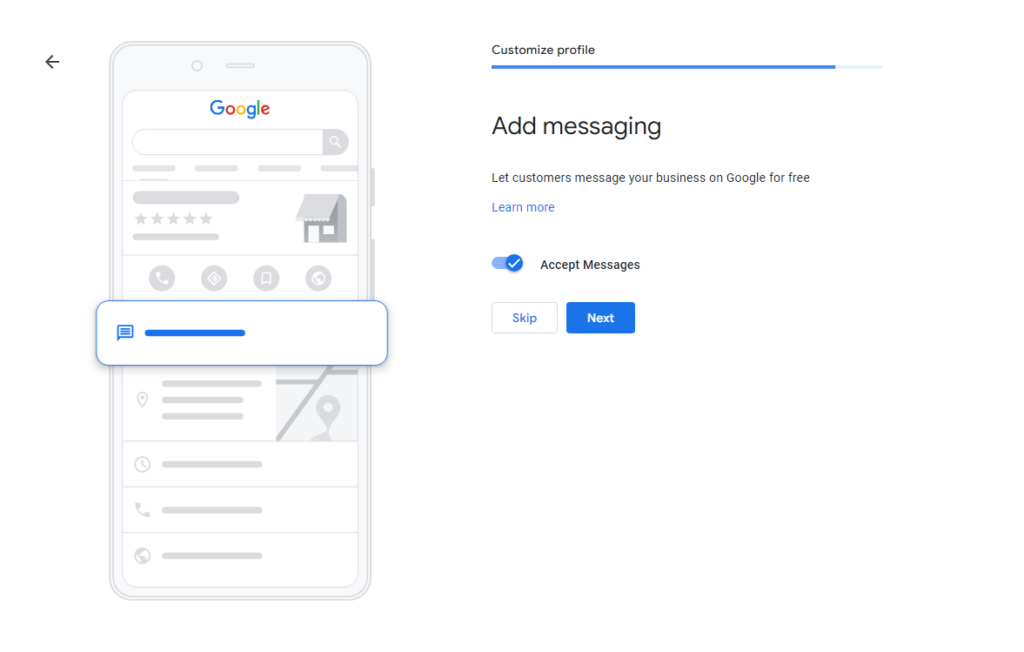
You may get a screen where Google asks if you would like to accept messages from customers on your Google Business Profile. In order to keep this feature activated, you will need to check your GBP daily so you can respond to messages within 24 hours. Otherwise, Google may deactivate this feature on your profile.
If you’re not sure if you want to implement chat and messaging yet, feel free to skip this step and come back to it later.
You can find more information on the GBP messaging system at this Google Business Profile Help page dedicated to messaging features.
Step 11: Add a Business Description

You can now add a description that clearly states what your business does. You want to naturally incorporate keywords here, which is easiest to do by telling people what services you offer.
Some other good additions are your company name, location, years in business, what sets you apart from competitors, and any other pertinent information that you think your customers would appreciate knowing.
Step 12: Add Photos of Your Work
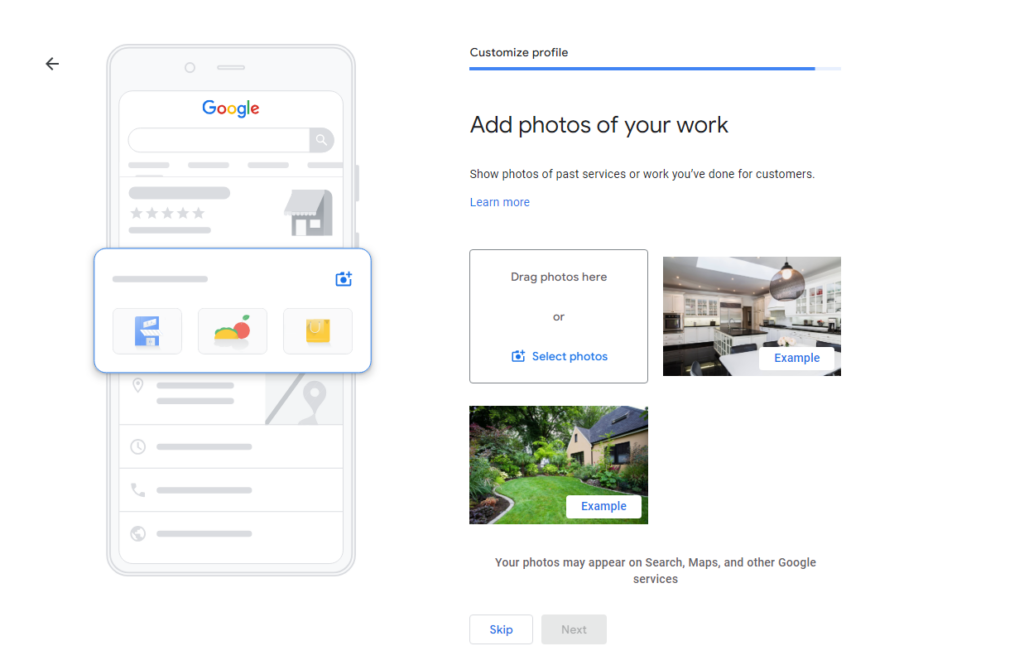
You’ll now have the option to add photos of work you’ve done in the past. If you don’t have any photos yet, feel free to skip this step and add some later.
Keep in mind that this is an extremely important section of your GBP, especially for service businesses that produce a completed product or service (e.g. countertop installation, landscaping, lighting services), so you’ll want to add photos of your work as soon as possible.
Additional Offers from Google (Optional)

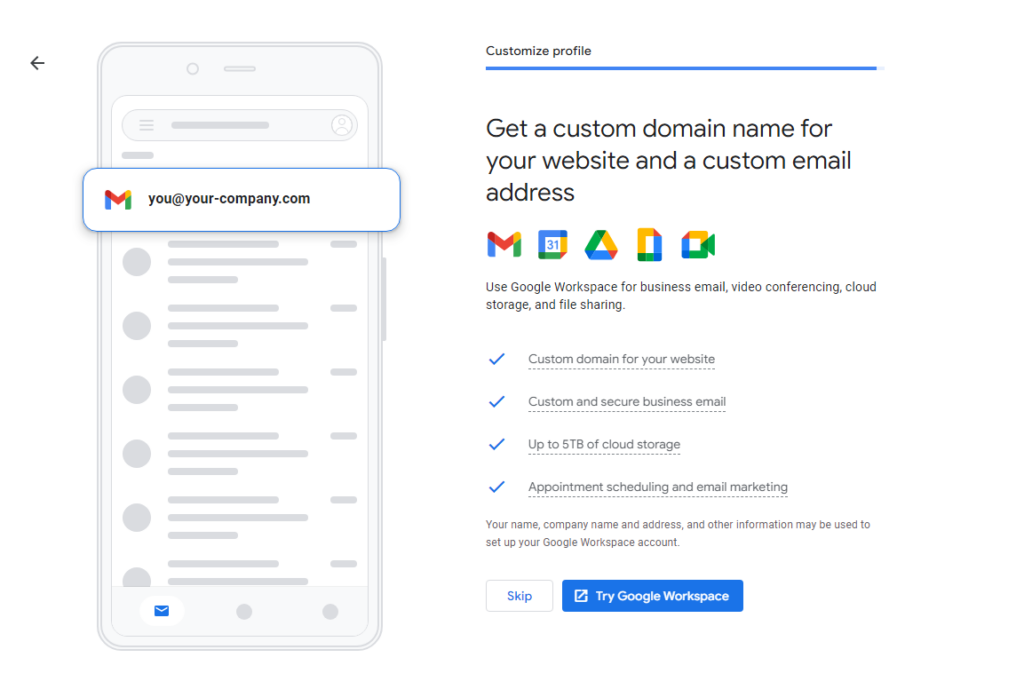
There are some additional prompts Google may ask during the process of setting up your profile. These are completely optional, but if you’d like to take advantage of them, feel free to do so.
- Claim $500 advertising credit
- Get a custom domain name for your website and a custom email address
Accessing Your Google Business Profile
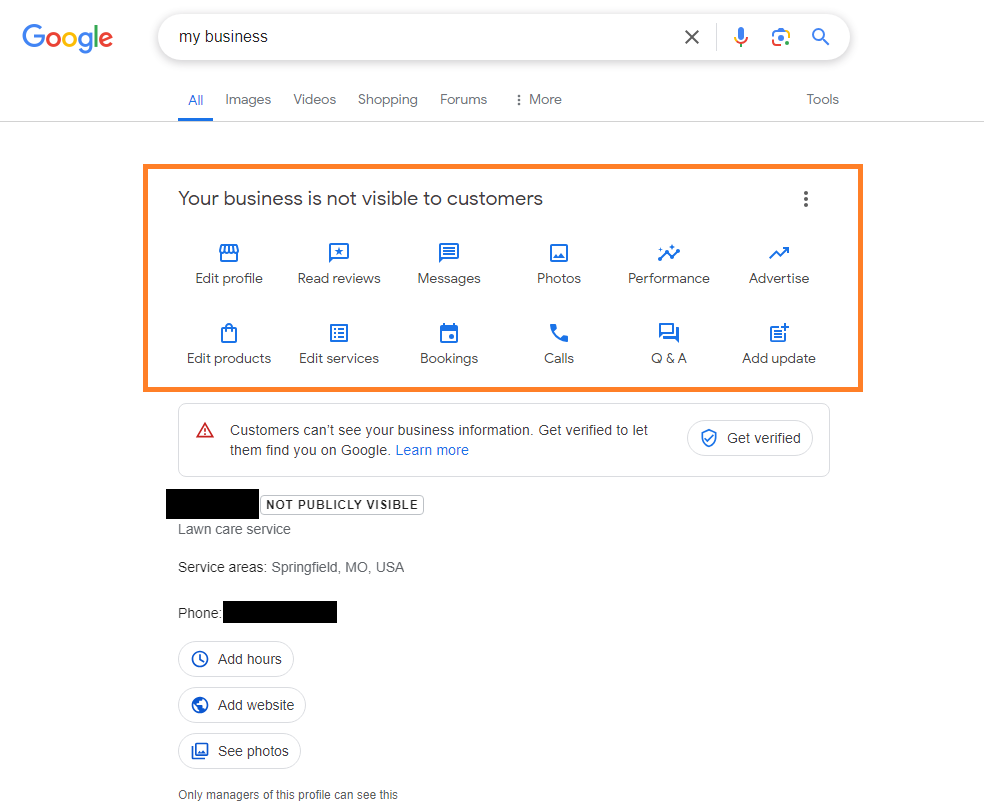
Once you’ve completed the setup process, you can access your profile to make changes by searching for “my business” while signed into the Google account you used to create your profile.
Be aware that this does not mean your business is live on Google. If during the setup process you were asked to verify your business, customers will not see your profile until the verification process is complete.
Final Thoughts
Congratulations on completing the setup of your Google Business Profile! By following the steps in this guide, you’ve taken a significant step towards growing your business.
Moving forward, remember to regularly update your profile with the latest information, respond promptly to customer reviews, and utilize all the GBP features available to you to maximize the benefits of your profile.
If you’re looking to further improve your results or if you have any doubts about the completeness of your profile, consider exploring our specialized Google Business Profile services.
Our services are designed to help you achieve higher visibility in search results, attract and convert more customers, and maintain a competitive edge against other businesses who may be more established.

0 Comments